I’m all about decorating with Disney touches this year, but with shopping for Christmas presents, cooking, baking, and wrapping, I want my DIYs to be easy and affordable. This year, I created Hidden Mickey Christmas wreath using affordable ornaments. Plus, all of the other things I used came from the dollar store. Here’s my tutorial for a DIY Disney: Hidden Mickey Mouse Christmas wreath!

As a family, when we visit Walt Disney World we love to look for hidden Mickeys (have you seen the ones at Magic Kingdom?).
So, why not incorporate our theme park hunt into a cute wreath, especially when it’s a touch of Disney World Christmas magic? The wreath is perfect for outdoors, indoors, and anywhere else you can think of. Here’s how to make a Hidden Mickey Christmas wreath.
I mean, I’ve already made Mickey Christmas ornaments and Mickey snowflakes, so why not? I even blinged out my Magicband with rhinestones.
DIY Mickey Mouse Christmas Wreath: Tutorial Needs
Items I got at Dollar Tree:
- Four different sizes of plastic ornaments ranging from 1″ to 2″. I bought eight packages in total, but had plenty left over. Choose complimentary colors.
- 1 10″ Styrofoam wreath
- 2 50 feet long packages fluffy garland or one 100 feet in length). You could use skinny garland but the results will vary.
- 1 5.5″ Red Glitter Bow. Mine came in a two-pack.
Additional items you’ll need:
- Hot Glue Gun
- Glue Sticks. I ended up using six in total.
I also bought a wreath hanger at Dollar Tree, but this is totally optional.
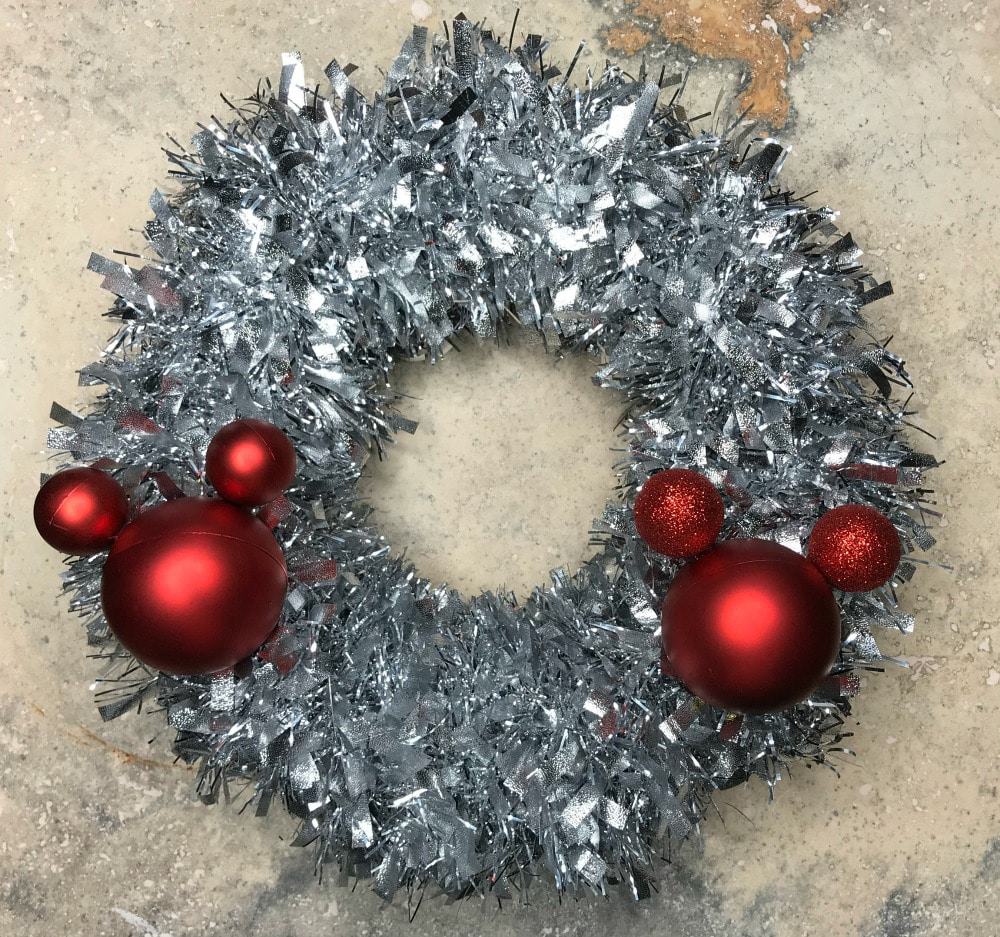
DIY Mickey Mouse Christmas Wreath: Hidden Mickey Tutorial Step One
Gather all of your crafting items listed above. It’s much easier to have them in one spot. Then, heat up your glue gun and be careful. I’ve been burned by mine before.
The first step is to wrap the silver garland around the Styrofoam wreath. I used two full lengths of garland because I wanted mine nice and full. Once that’s done, make sure to tuck in the ends of both and add a little bit of glue to hold.

Once the garland is ready, think about exactly where you want the Mickey heads to go. I played around with spacing for a minute before I committed to a location. Also, play with the sizing of the ornaments to get the right dimensions. I ended up going with two 1″ red ornaments and four 2″ ornaments. Hot glue each ornament separately.

DIY Disney Christmas Wreath: Hidden Mickey Tutorial Step Two
I wanted different colors and textures for my wreath, so I laid out all of the ornaments on the table and just began playing with them. I didn’t want three red ornaments together anywhere else so the Hidden Mickeys would be pretty easy to spot. hot glue each ornament down, one at a time, until 3/4 of the wreath is filled in. I only covered the top part of the wreath, too.
TIP: Leave a space large enough for your bow at the top of the wreath.

DIY Disney Christmas Wreath: Hidden Mickey Tutorial Step Three
Hot glue the bow to the empty spot at the top of your wreath, then fill in any empty spaces. You can make it as full or as spacious as you like.

Mickey Mouse Christmas Wreath: Step Four
Admire the product. Hang on the wall. Hang on the door. It’s totally your choice.
Need More Disney Crafting in Your Life?
https://www.sandandorsnow.com/2016/12/diy-mickey-ornaments-easy-affordable-no-gluing/
https://www.sandandorsnow.com/2015/12/decorate-with-mickey-mouse-this-holiday/

Leave a Reply