Making DIY Mickey ears might look difficult but they’re actually pretty easy, happily. And, since you’re making them, you can create unique Mickey ears by changing the theme and color story. Here’s an easy, step-by-step guide to making DIY wire Mickey ears with crown (and without) plus helpful tips to save time and money.
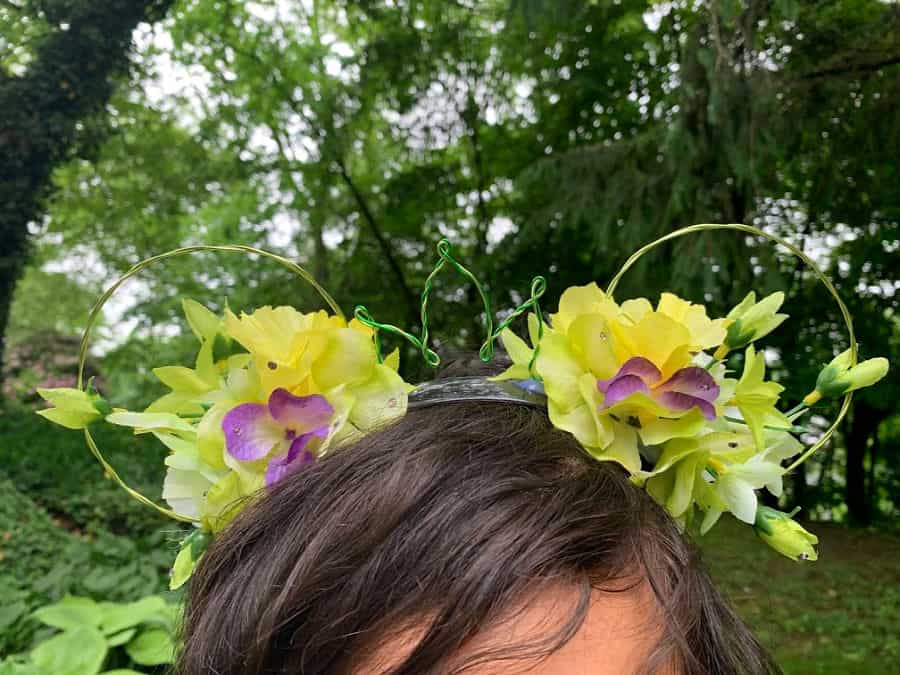
Not gonna lie, I’ve had plenty of time on my hands lately. And another truth: I miss Walt Disney World so much. I miss the ambiance, the smell of food, and I miss buying Mickey ears. So, I bought a few items from the store, bought a few from Amazon and here I sit with 20 additional pairs of ears to wear when I’m able to visit the theme parks. My method is simple, is no sew, and I think they’re downright adorable. Here’s how.
Disclosure: You’ll find amazon affiliate links in the post for a few of the supplies mentioned. If you click on the link and make a purchase, I’ll receive a small commission at no additional cost to you. Thank you for supporting our blog!
DIY Mickey Ears with Crown Supplies
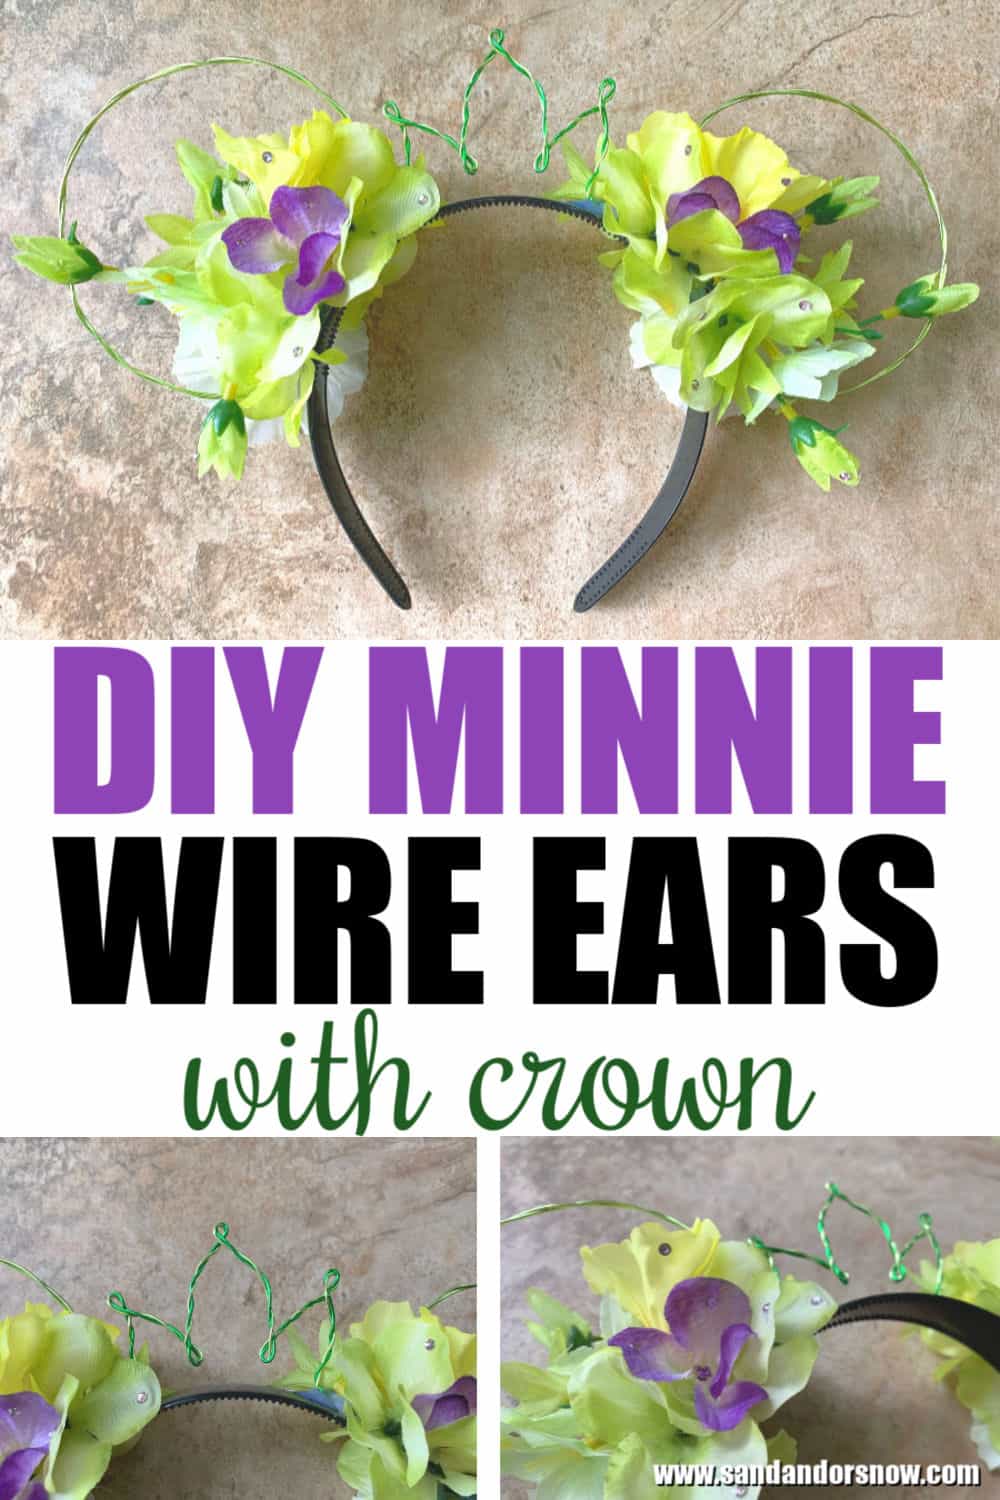
For this tutorial, I’m using “Princess and the Frog” as my inspiration. Plus, Tiana is one of my favorite Disney Princess.
Craft wire – I used two shades of green and 18 gauge for this one. If you don’t want to twist the wire (or don’t want two colors), look for 14 gauge wire instead. 16 gauge works well, too, but my preference is 14 gauge for a single wire look. If you’re looking for craft wire at Dollar Tree, it comes in a few different colors and each package is enough for at least one pair of Minnie mouse flower ears.
FYI: The wire that I used was craft wire from Amazon. It comes in a multi-color pack and has two shades of green.
Headband – I ordered a bundle of sturdy, black headbands from Amazon which were pretty inexpensive. They have a one-inch width and have small teeth on the inside to keep them from falling off. It was a 20-pack for $12.99 plus tax (were Amazon Prime members so free shipping), making each roughly 70 cents each. Great deal!
Silk flowers – In lime green, yellow, and purple. I found mine at Dollar Tree. I made sure to get medium and small-size flowers.
Flat back crystals – I like the sparkle they give (my family calls me a moth) and I think they amp up the pretty factor. I found lavender crystals on Amazon.
Additionally, you’ll need:
- Hot glue gun
- Glue sticks – I found mine at Dollar Tree
- A four-inch round item for bending the ears. I use my Pyrex measuring cup
- A tape measure. You need it to be flexible.
- Permanent marker
- Wire cutters
Want the scoop on how to save money on your next Disney vacation? Here are must-buy items at Dollar Tree to take to Disney.
DIY Mickey Ears with Crown First Steps
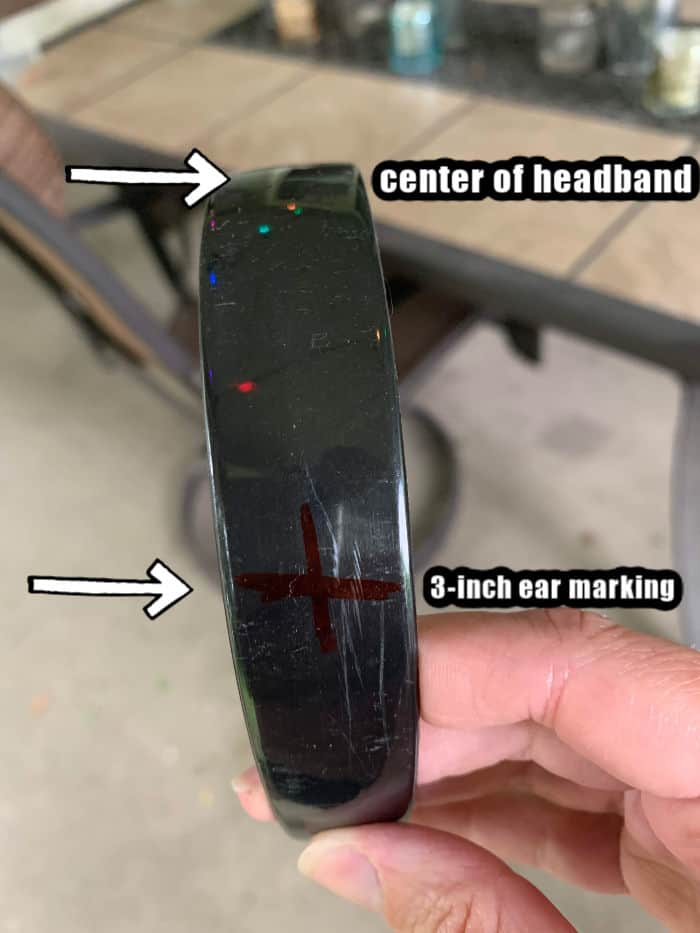
1. Find the center of your headband. The headbands I use are 14 1/2 inches round, so I found the center at 7 1/4 inches and made a mark with a sharpie.
2. Make a mark at three inches on either side of the center mark. Feel free to adjust it to fit your head/style.
3. Plug in your glue gun and make sure you have plenty of glue sticks. It took me roughly three glue sticks per ear headband.
Minnie Mouse Flower Ears – Bending the Wire
If you want a single wire look, skip down to bending the ears.
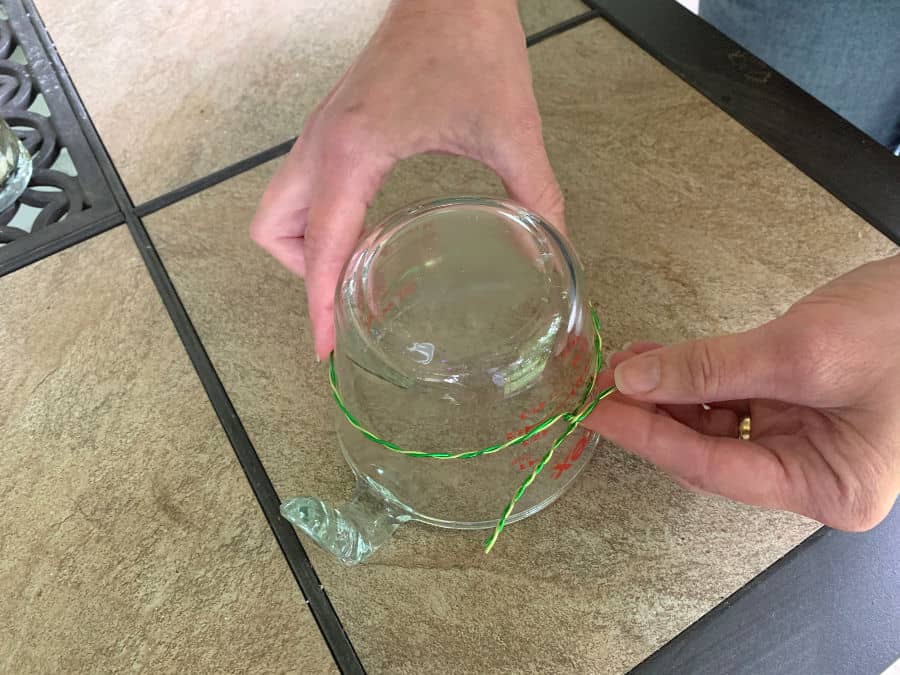
First, cut each piece of wire 18 inches in length using wire cutters. I used one as a length guide and it was easy to cut the other three. Then, using two of the four wires, twist one around the other from end to end. Tip: I roughly straightened out the wires before twisting as it made them less likely to snag around each other. Truth, you’ll end up cutting some extra off either end before you glue them down, but it’s easier to cut the extra than to have not enough wire to glue down.
Bending the Ears
Once you have both double wires twisted (or single wire with a bigger gauge), get your 4-inch template and bend the wires around it gently. It turns out that my Pyrex cup is four inches at the 2/3 cup mark, so it’s easy to eyeball. When you have the wire wrapped and at the correct size, twist it twice firmly.
Next, leave about 1 to 1 1/2 inches of wire on either end. I bend mine in the same shape as the headband so it’s easier to keep in place when you’re gluing. If you find you’re a little bit off your mark, wait until the glue completely dries and gently bend the ears in the proper direction.
Gluing the Wire to the Headband
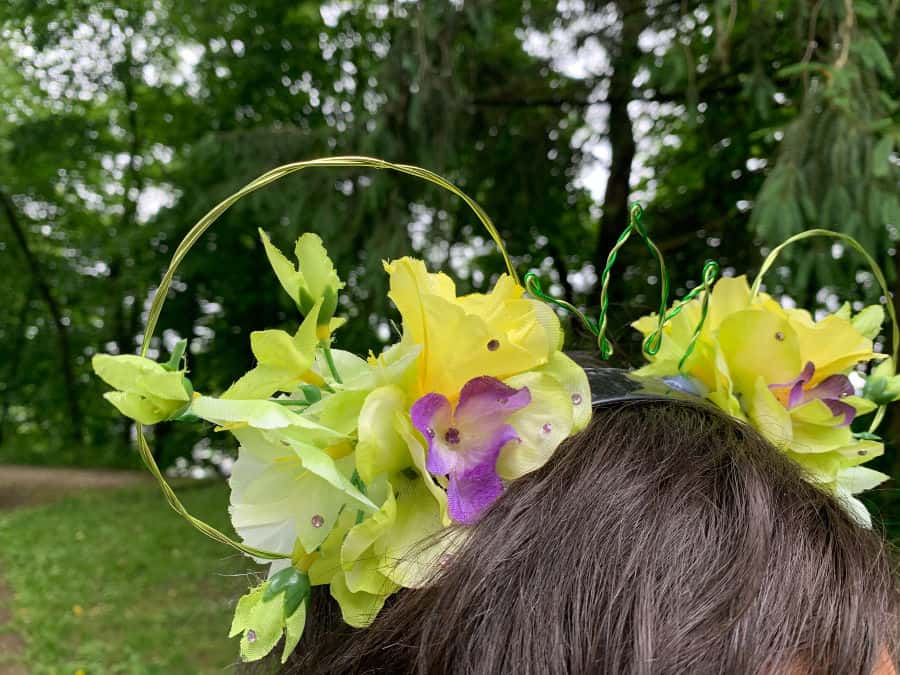
I have to give caution to using a hot glue gun. Please heed all proper usage statements and warnings to avoid injuries.
Remember those 3-inch marks you made on either side of the center of the headband? Doing each one at a time in the center of the marks, put a generous stream of hot glue and immediately put the twisted wire part of the ears into to it minding your fingers. Hold with firm pressure until glue cools and then do the other side, making sure to keep each ear centered over the marks you drew.
If you find you have too much leftover wire, use your wire cutters to trim.
Next step: adding silk flowers.
Placing Silk Flowers on DIY Mouse Ear Headband
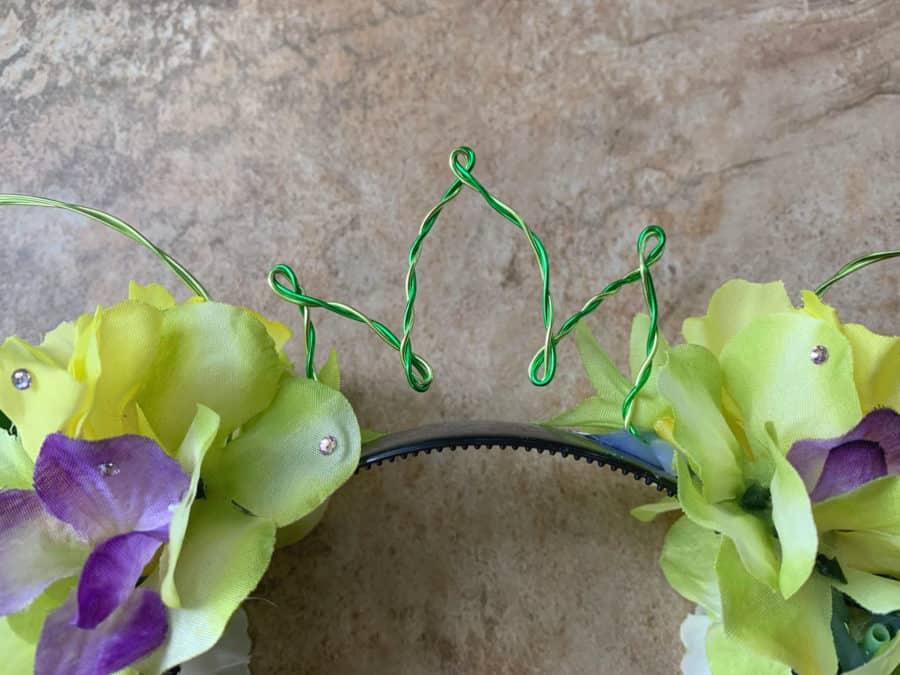
Personally, I like to add the wire crown last. In my experience, adding the flowers first will gauge how large the crown will be.
Here’s where you can let your creativity loose! Using the wire cutters, or simply popping the flowers off the stems, hot glue each silk flower one at a time. For me, I like asymmetrical ears and flowers. I also start with the largest flowers and work my way down. TIP: Before you use the hot glue, test drive the location of each flower. What might look great in your head may not work on the headband. Also, make sure to add flowers to the back part of the ears to complete the look and hide any wires/glue/stems.
For the flowers, it’s nice to get a variety of styles and colors. I chose both mature flowers and buds for contrast and added in a pop of purple for texture.
DIY Wire Mickey Ears – Making the Crown
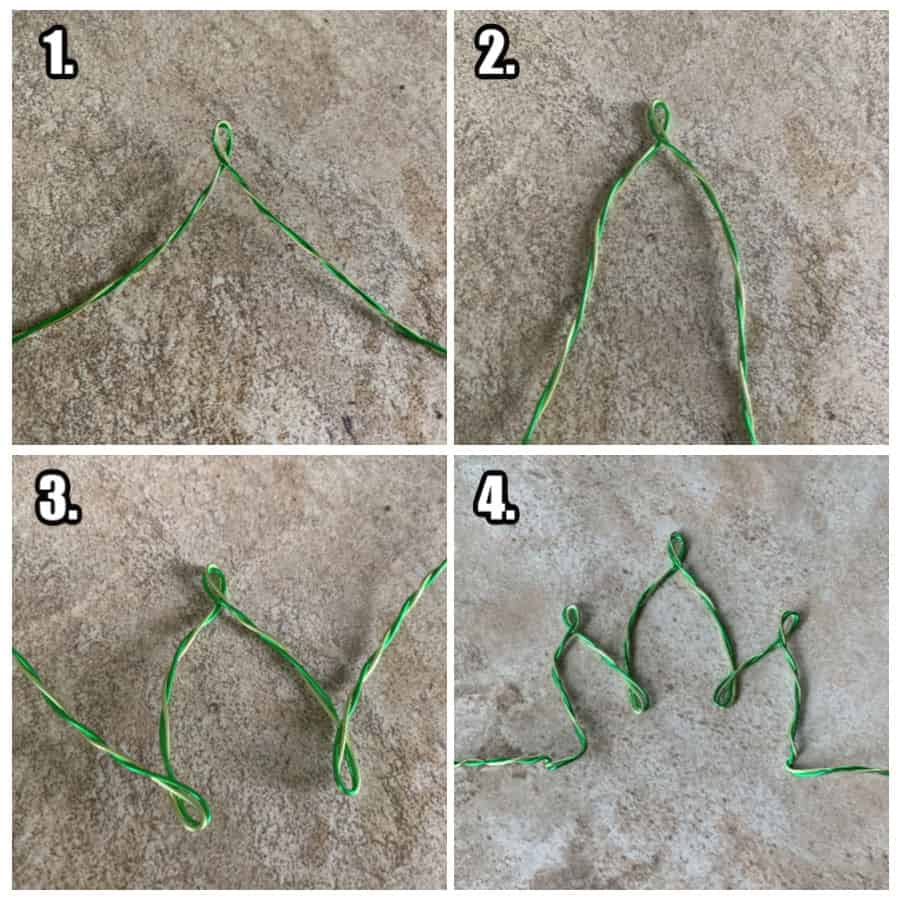
Essentially, my wire crown is five loops, three on the top and two on the bottom. I made the two sides slightly shorter to make it look like a lily and because it’s aesthetically pleasing to my eyes. But, you do you. Here’s how I made a wire crown.
Start with twisting your 18-inch long wires together.
- Find the center of the wire, but don’t pinch it, and make a small loop.
- Give each side a little outward curve and then make a loop on either bottom side so that the wires point up.
- Lastly, make another loop on either side about an inch below the original middle loop. Give each of the outer two crown peaks a slight outward bend as well.
Lastly, hot glue the crown to the center of your headband.
Hot glue smaller flowers to hide the wires and decorate until it’s exactly how you want it.
DIY Wire Mickey Ears: Adding Crystals
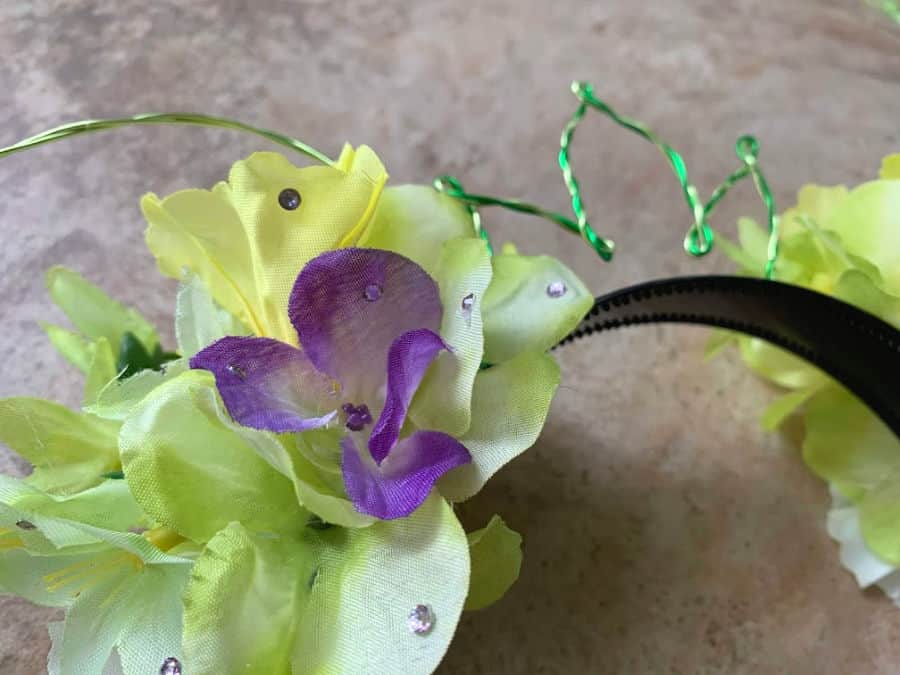
This step is totally optional but, again, I like a little sparkle. Flat back crystals are easier to hot glue and stay in place. While the most time consuming for me, it adds a special touch. Add a teeny amount of hot glue to the place you want the crystal and place the crystal. I like to use a pair of old tweezers so I don’t burn my fingers. A toothpick dipped in a little water helps to pick up the crystals as well.
More DIY Disney
https://www.sandandorsnow.com/2016/12/diy-mickey-ornaments-easy-affordable-no-gluing/
https://www.sandandorsnow.com/2019/02/diy-disney-minnie-easter-wreath/
https://www.sandandorsnow.com/2019/10/diy-disney-halloween-ornaments-mickey-jack-o-lantern/
- create your own Mickey ears
- Minnie Mouse flower ears
- create your own Minnie ears
- DIY Mickey ears
- floral Minnie Mouse ears
- DIY Mickey ears no sew
- DIY Minnie ears
- Minnie ears floral
- DIY mouse ear headband
- DIY wire mickey ears with crown
- unique Disney ears

Leave a Reply