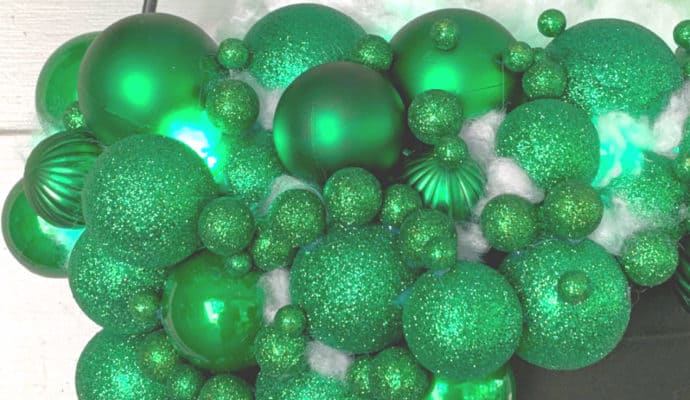
Decorating for Halloween and want a super easy, super adorable witch cauldron to hang on your wall or door? I’ve created this DIY mini witch cauldron that’s perfect for just about everywhere! Here’s how to make a witch’s cauldron including everything you’ll need to have on hand.
How to Make a DIY Witch Cauldron
If you’ve popped onto the blog (thank you!), you probably know just how giddy I get for Halloween. And truthfully, we start decorating in August. This Halloween season (yep, it’s far more than a day for this gal!), I wanted a witches cauldron to hang on my front porch under my Minnie Mouse witch hat but there were none that I really dug in the stores.
So, taking the matter into my own hands, I dug around in my Halloween storage room (I warned you) and found an old, plastic cauldron. I thought, “I could cut the back off of it, add some lights and green ornaments…”. The rest, they say, is history.
I really love how this DIY mini witch cauldron turned out an hope you find inspiration from my tutorial.
Want a super easy tutorial for Mickey Mouse Halloween ornaments? Here’s how to make Disney jack-o-lantern ornaments.
DIY Witch Cauldron Supplies
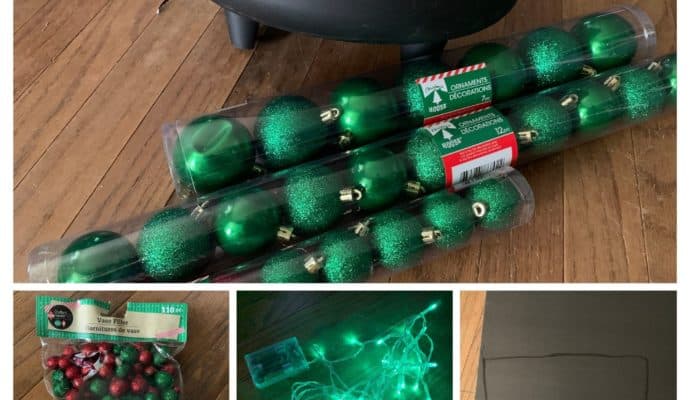
Here’s what you’ll need to make a DIY mini witch cauldron:
- 1 sturdy cauldron – Don’t buy/use the thin, plastic kind. You’ll risk breaking/cracking it when you cut it.
- Plastic green ornaments in several sizes. I found three sizes at my local Dollar Tree. Look in the Christmas section.
- 1 package vase fill. Again, dig through your Dollar Tree’s Christmas section.
- Green lights. I bought my green LED lights from Amazon for under $6. My string has 30 LEDs on it. If you don’t mind a cord hanging, go ahead and look for corded green mini lights.
- Black foam board
- Cotton/Poly filling. Truth? I used some from an old comforter, but you can always buy a bag.
- Glue gun or A6000 glue. I’d highly recommend a glue gun as it dries much faster.
- String or plastic coated wire to hang
- 2 bread bag ties
- A hacksaw or electric saw to cut the cauldron
- A drill or something to make a hole in each cauldron side
DIY Witch Cauldron Step 1: Cutting the Cauldron
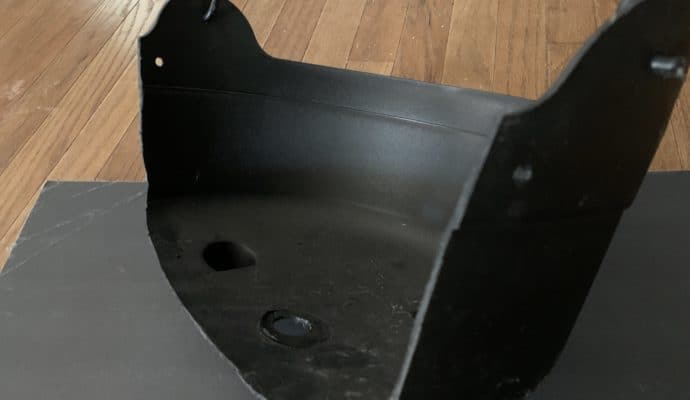
First thing you’ll need to do is cut your cauldron to make the back flat. PLEASE, please be careful. We have an electric saw which worked well but you could you a hacksaw, too. TIP: draw a line exactly where you want to cut and avoid cutting off the handle area.
Next, make two holes just under the cauldron’s handles. You’ll need these to hang the cauldron when finished.
DIY Witch Cauldron Step 2: Gluing the Foam Board
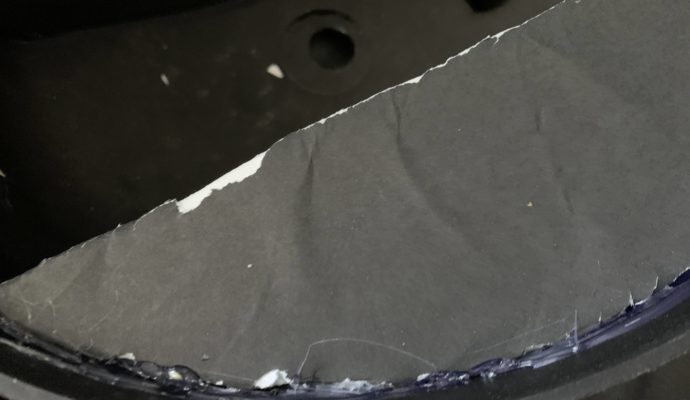
Next, trace the flat back of the cauldron onto the black foam board. Cut out using scissors and set aside.
Trace around the curved top of the cauldron and cut out to make a lip at the interior top’s front. Hot glue into place and let dry. Look, it doesn’t have to look perfect as it will be covered with fluff and ornaments.
DIY Witch Cauldron Step 3: Gluing the Ornaments
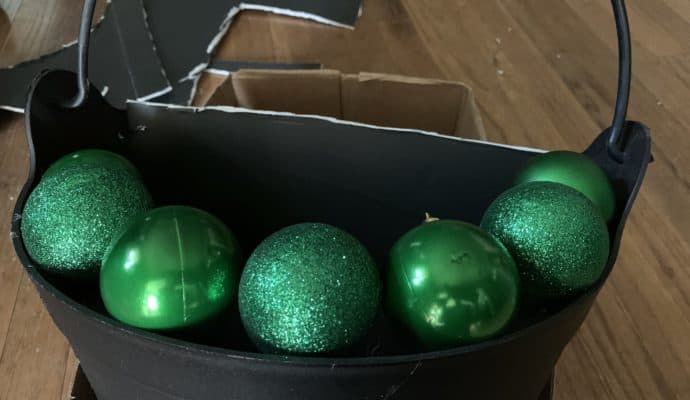
This step is were you can get creative. I started with my largest ornaments and hot glued them to the foam board on the top front. Pop off the gold hangers so they don’t show (I did this after I glued them into place, but it’s easier to do it ahead of time). Make sure you keep the tips hidden as well.
I found that starting with the large ornaments and working down to the small ones worked well to fill in holes and gaps. Of course, you do you and make it however you like.
DIY Witch Cauldron Step 4: Filling in Gaps
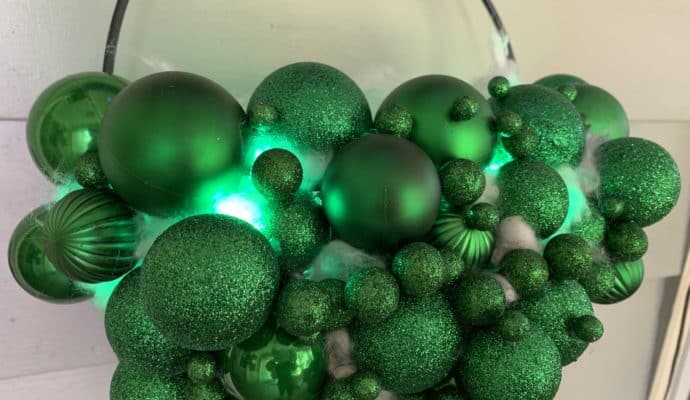
The last thing you’ll need to do to really make it look spooky is to take green vase fill and hot glue the balls to the larger ornaments, in the gaps, and wherever you think it looks cool. I liked the look of a few on top of some of the larger ones as well.
Using small pieces of the cotton filling, fill in the gaps at the top of the cauldron. This makes it look like it’s really bubbling and diffuses the green lights when you add them in. Then, take a big piece, fluff it up, and add it to the inside. I like the look of it just above the top ornaments to really add to the bubbling effect.
DIY Witch Cauldron Step 5: Adding Foam Board to Back and Securing
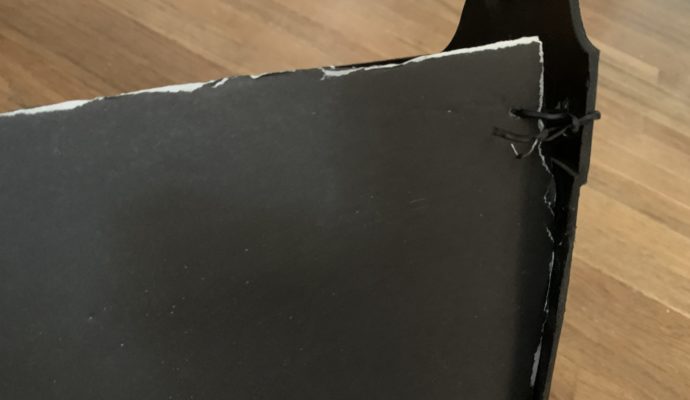
Honestly, you can do this whenever you like. While you can hot glue it, I preferred to use two bread bag ties to secure in case it broke or ripped. If glued, it would be a mess to tear out.
Using those same drilled holes, secure your plastic wire to the back like you were hanging a picture frame. Make it nice and taught so you don’t see it.
DIY Witch Cauldron Final Step
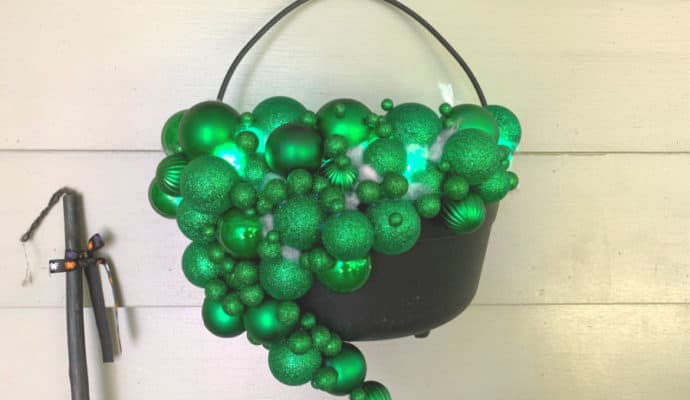
Finally, add your lights to the cauldron. I poked mine through some tiny gaps at the top and added in more fluffy filler where necessary.
And that’s it! As you can see, I actually hung it from the handle to test, but I really think it looks better floating like in the photos higher in the post.

Leave a Reply