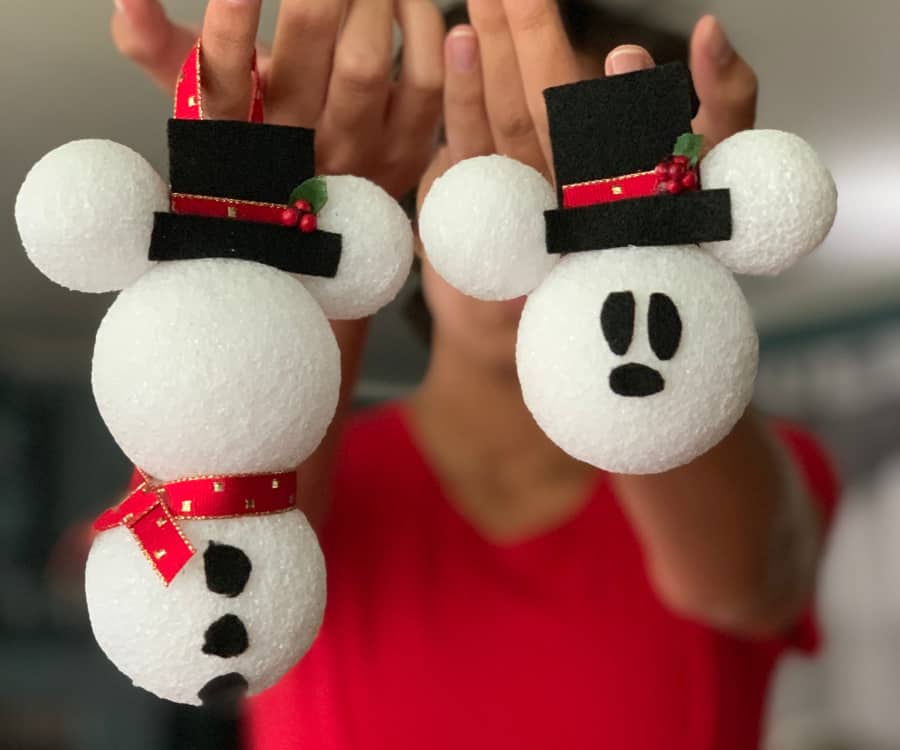
Looking for a super easy Mickey Christmas ornament tutorial that uses only a handful of supplies? Here’s how to make Disney Christmas ornaments with a fun, Mickey snowman ornament spin!

In my house, every holiday has to have a Disney spin. In the past, I’ve created a Minnie Mouse Easter wreath tutorial, Mickey Halloween ornaments, and even a classic Mickey head Christmas ornament.
But this year, I wanted a fun spin on Mickey ornaments. I’ve been seeing Mickey Mouse as a snowman all over the internet and wanted to make a super easy, super affordable DIY that both kids and adults can do. Additionally, I’ve created two styles to choose from, so feel free to pick one or both to recreate.
Here’s how to make Disney Christmas ornaments with a Mickey snowman style and a step-by-step tutorial for what you’ll need.

Mickey Snowman Ornaments: Supplies You’ll Need
- White Styrofoam balls: Choose two sizes that work for the head/body and ears.
- Toothpicks
- Glue – I used A6000 but hot glue will work well, too.
- Christmasy ribbon. I used 1/4 inch thickness
- Black felt
- Optional – Small berries and silk ivy leaves
Mickey Snowman Ornaments: Step 1
This DIY really is super easy, but I’ll explain in as much detail as possible:
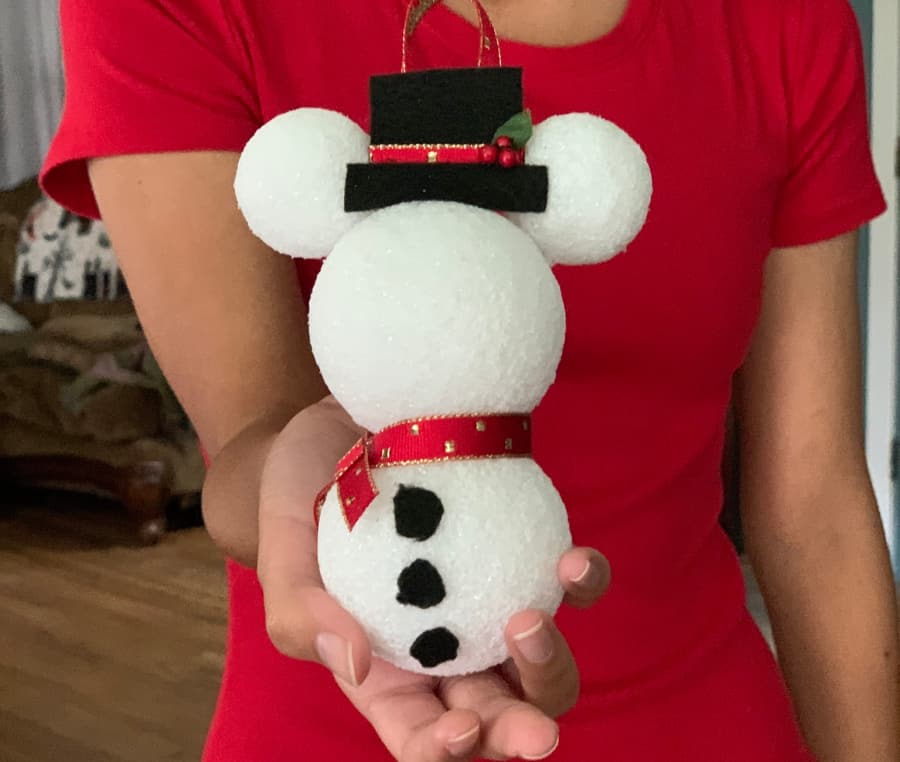
Using toothpicks, connect the smaller styrofoam balls to the head. While mine stuck well with toothpicks alone, I used A6000 glue to make sure they didn’t budge.
Give the ears a minute to dry. If you’re making a Mickey snowman with the body, use a toothpick and glue to connect those, too. Additionally, cut circles out of the black felt for coal buttons. I made mine jagged to look more like coal.
If you want to make eyes and a nose, cut two ovals out of felt for the eyes and a slightly smaller oval for the nose. Glue on.
Mickey Snowman Ornaments: Step 2

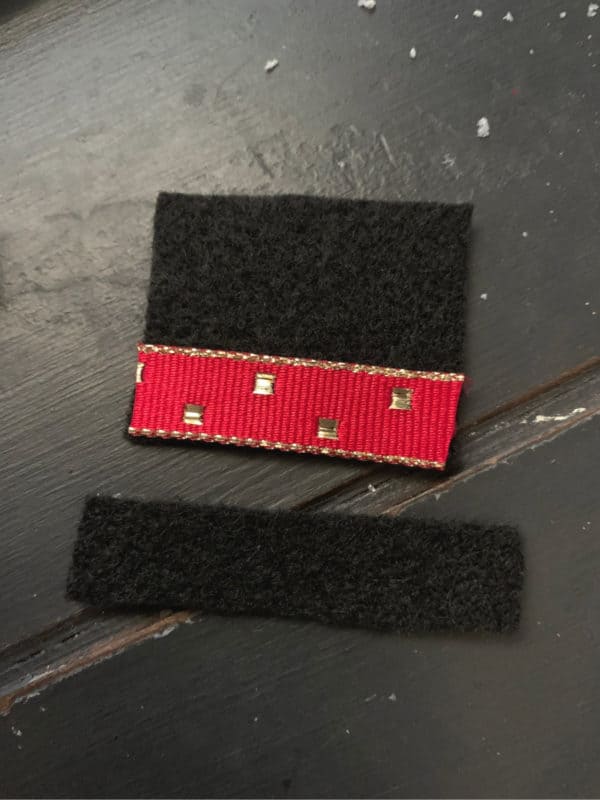
Next, work on the felt hat. Mine was made with three pieces: a brim, the ribbon, and the top. Honestly, I eyeballed a rectangle and square for the black felt parts. My dimensions are:
- Hat brim: 2 inches long, 1/2 inch tall
- Hat top: 1 1/2 by 1 1/2 inches
- Ribbon: 1 1/2 inches long (same length as top hat part)
Glue the ribbon to the bottom of the square then glue the felt brim on top so the ribbon peeks out. For mine, I found small, red foam berries and cut a leaf shape out of a larger silk ivy leaf. Of course, feel free to omit if you want a simpler looking hat.
For the Mickey snowman’s body, cut a length of the same ribbon you used for the hat and wrap around the neck area. Glue down. I also cut a small square out of the ribbon and glued it to the center of the scarf to look more realistic.
Mickey Snowman Ornaments: Step 3
The last step is the hanger. Take a piece of ribbon and fold one edge over the other and glue. Next, glue to the top of Mickey’s head in the back. Another way to hang is to simply use a wire Christmas ornament hanger and attach it to Mickey’s head with glue. Personally, I think the ribbon ties in the scarf and hat.
More Disney Craft Ideas
https://www.sandandorsnow.com/2016/12/diy-mickey-ornaments-easy-affordable-no-gluing/
https://www.sandandorsnow.com/2019/10/diy-disney-halloween-ornaments-mickey-jack-o-lantern/

Leave a Reply