Making Halloween decorations, especially with a Disney kick, is definitely up my alley. And taking a cue from Minnie Mouse’s Halloween costume at theme park parties, I created this super easy, super affordable wall hanging that’s perfect for indoors or outside. This year, it’s going on my porch to add a fun, whimsical touch to my outside decor. Here’s how to make your own Minnie witch hat wreath including instructions and step-by-step photos.
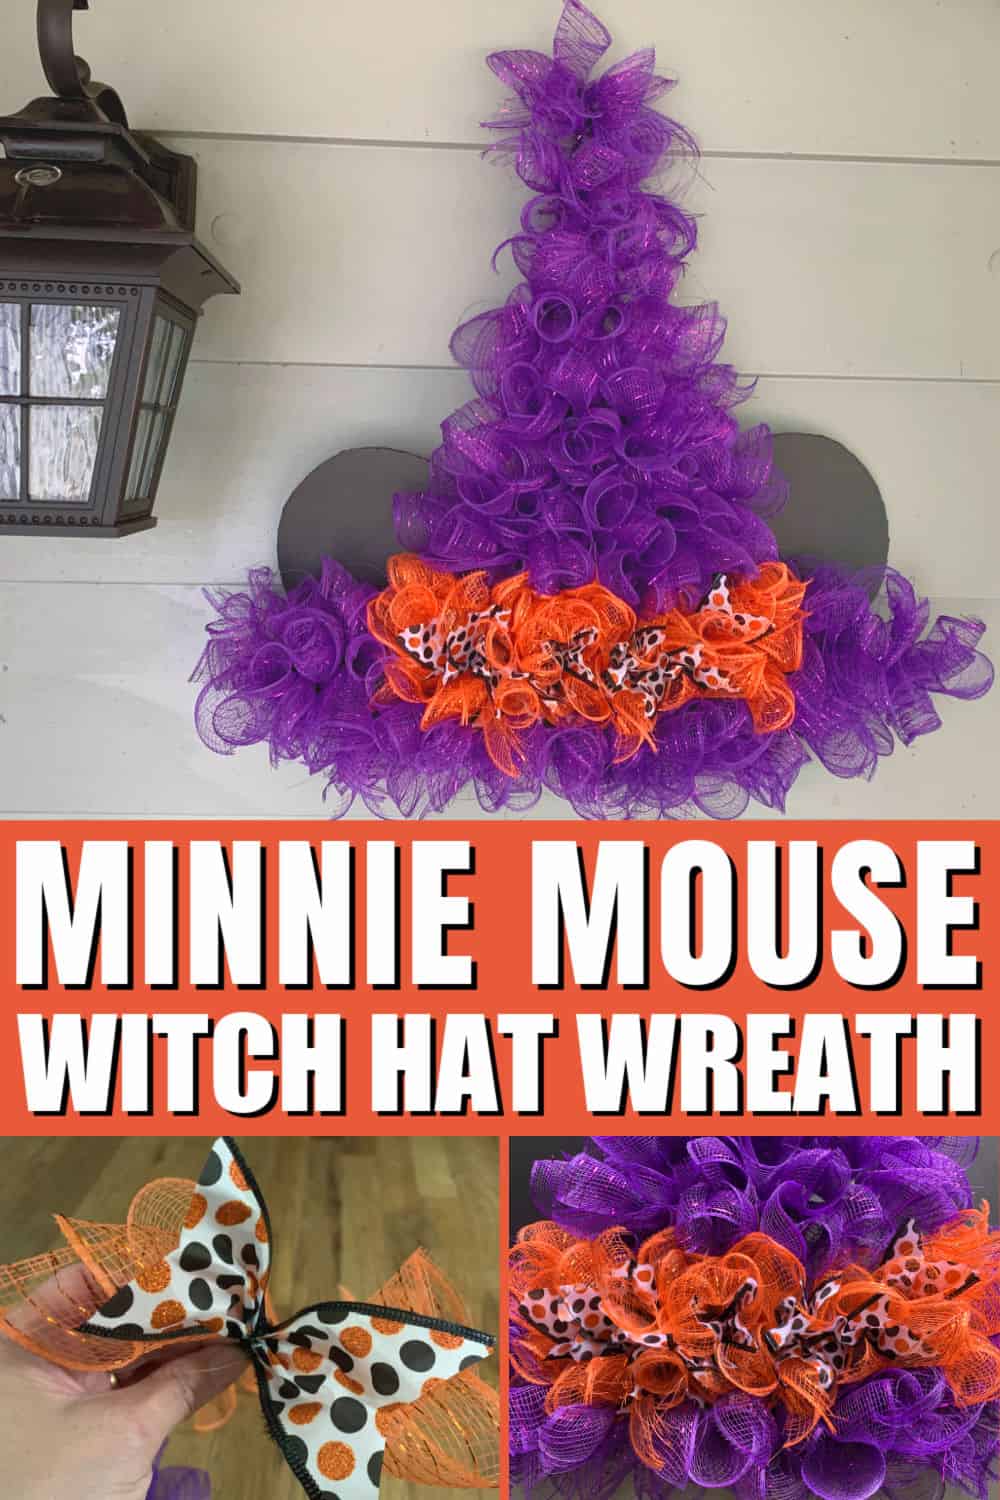
Each year, my family & I love spending Halloween at Walt Disney World. We adore going to Mickey’s Not-So-Scary Halloween Party and checking out the decorations. and it’s always fun to see what Minnie Mouse is wearing each Halloween season. For the past few years, she’s been an adorable witch, so I thought why not make a Minnie Mouse-inspired witch hat wreath for my porch! Here’s the easy tutorial.
Minnie Witch Hat Wreath Supplies
Here’s what you’ll need to make your Minnie witch hat wreath:
These supplies I found at Dollar Tree:
- 1 decorative mesh witch hat wreath form
- 5 rolls purple decorative mesh (5 yard spool)
- 1 roll orange decorative mesh
- Polka dot wired ribbon (3 yard spool)
- 1 package black tinsel stems (pipe cleaners). You’ll cut each piece in half.
- 1 piece of black foam board
You’ll also need:
- Scissors
- Optional: craft knife
- Black marker
- A pencil or pen
- 7 1/2 inch round template. I used a small salad plate that I already had on hand.
Minnie Witch Hat Wreath DIY: Step 1
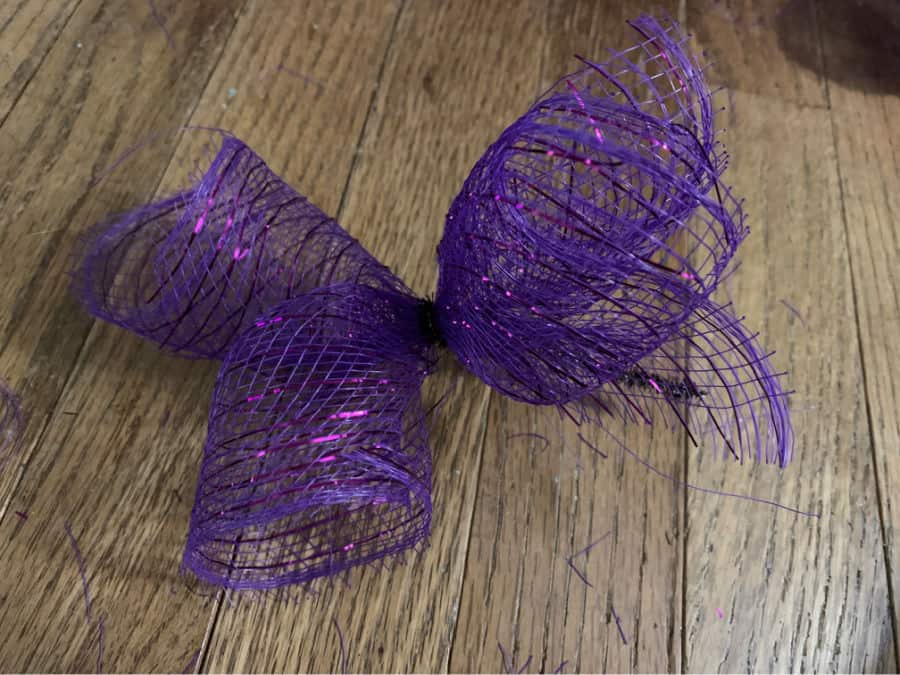
This step is definitely the most time consuming: cut 5 rolls of purple mesh ribbon into roughly 6-inch pieces. I had my daughter help me by holding the mesh out straight, making it easier to cut quickly. For each roll, I got 28 pieces. You’ll need two pieces per bunch, so you’ll have about 14 bundles per bolt. Don’t fret if you have a little more or less.
Cut three rolls of the purple at one time, take two pieces, and tie together with a black pipe cleaner. Before you start to tie the pieces, cut the pipe cleaners in half. I found a full pipe cleaner was too long.
Minnie Witch Hat Wreath DIY: Step 2
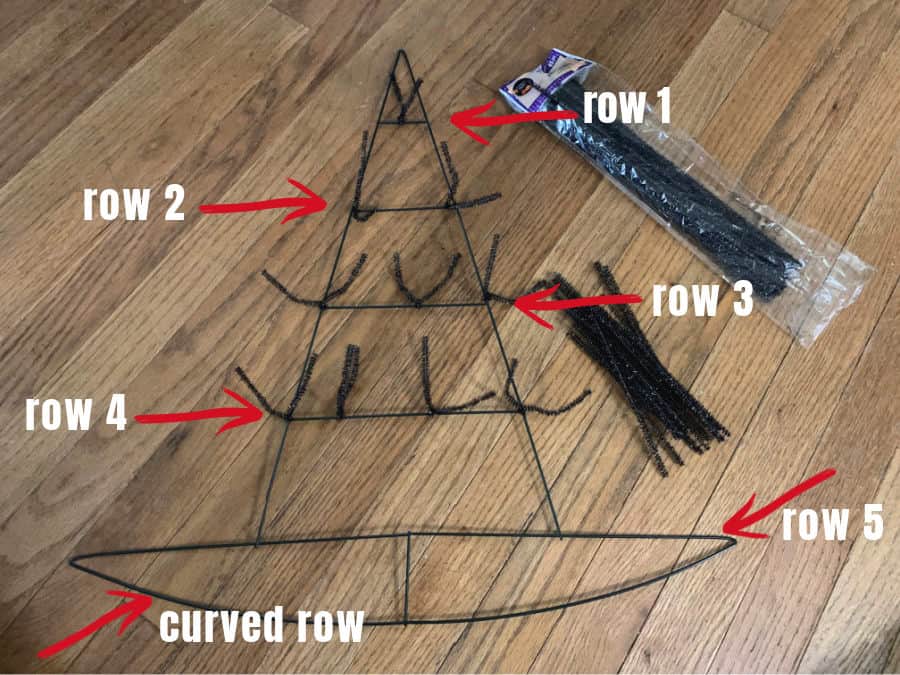
Starting at the hat’s peak, tie one two-piece bundle to the very tip. With each horizontal row, tie a bundle to each end and work your way to the center. It’s easier to keep the rows even and it also shows the form of the wreath as you’re working. My witch hat form has five horizontal pieces and a bottom arched piece. Tie purple pieces to the top four horizontal rows.
Once you get the hang of it, it’s pretty easy to just work your way down the four rows. I bought six purple bolts just to be safe, but I found that a total of five purple worked well.
When I was making my witch hat wreath, I used three purple bolts for the sections above the polka dot ribbon and two full purple bolts for the bottom piece. I wanted it to look full so I really jam-packed in it.
Minnie Witch Hat Wreath DIY: Step 3
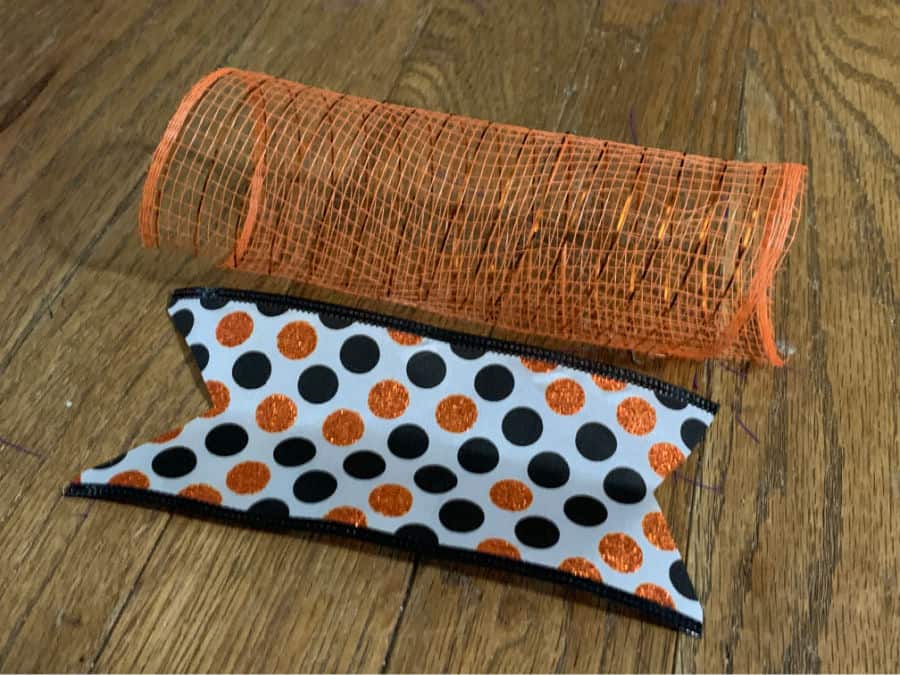
For horizontal row 5, you’ll want to cut your one bolt of orange mesh ribbon into 6-inch pieces. Next, cut your polka dot wired ribbon to the same-sized pieces. You want your ribbon pieces to be roughly the same length so when tied together there’s not one piece way longer than the others. Before you tie the ribbon together, cut notches in the ends of the polka dot ribbon.
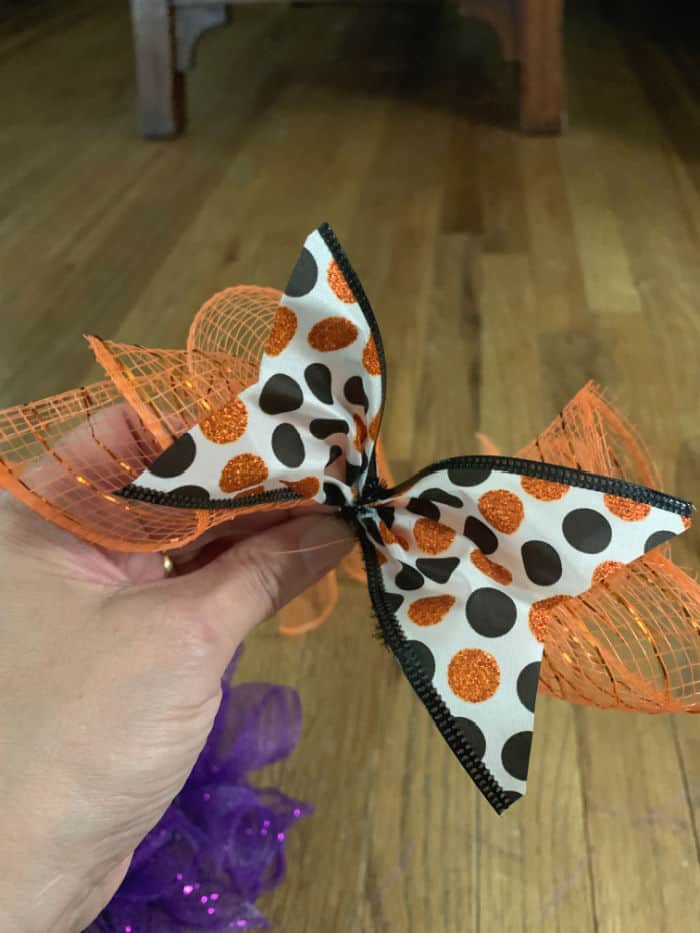
Take two pieces of orange mesh ribbon and add a piece of polka dot ribbon on top. Tie with a pipe cleaner in the center. I was able to get 14 bundles of orange mesh ribbon but only 10 pieces of polka dot ribbon. To keep things consistent, I made four bundles without polka dot ribbon and put tow on either end. After that, tie the pieces with the polka dot ribbon to the fifth horizontal wire.
Minnie Witch Hat Wreath DIY: Step 4
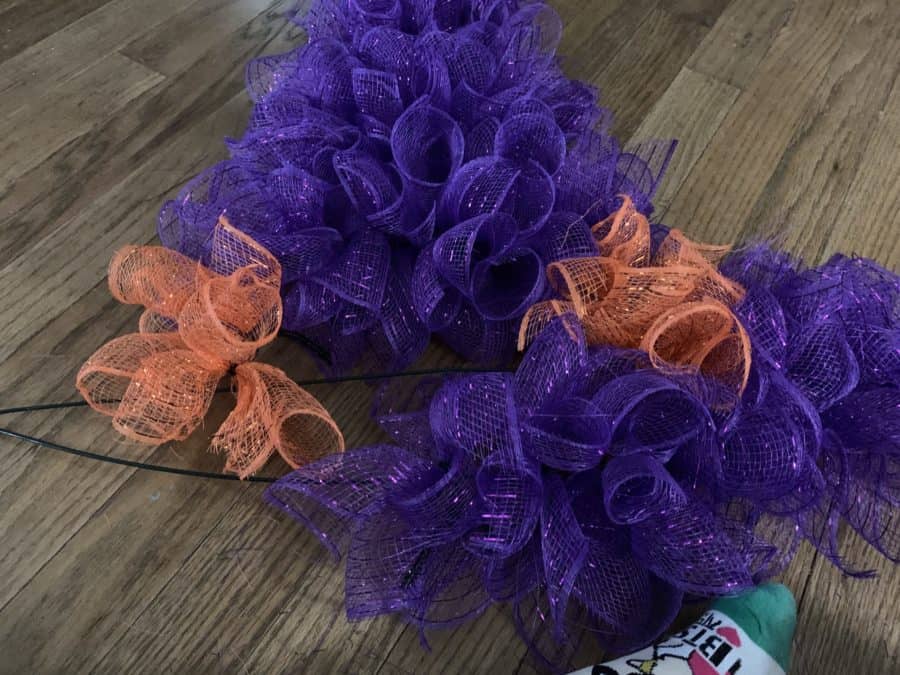
With your last two bolts of purple mesh ribbon, cut them into 6-inch pieces and tie them two at a time. You should have around 28 bundles. Tie all of these to the bottom, curved wire making sure it looks nice and full.
Minnie Witch Hat Wreath DIY: Step 5
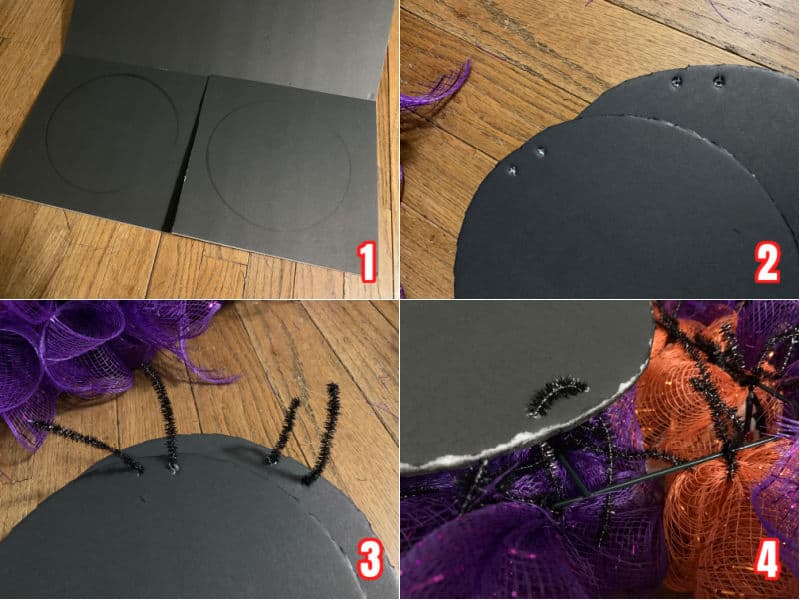
Using a 7 1/2 inch round template, make two circles on your black foam board. Cut out using scissors or a craft knife, but be careful not to cut yourself or your workspace. With a black marker, color the edge of the foam board to make sure it’s completely black.
Next, make two holes using your marker or a pen about an inch apart and roughly 1/2 inch from the edge of your circles. Taking one half of a pipe cleaner, thread it through the holes. Tie each ear to horizontal wire #4.
And that’s it! Feel free to tuck in longer ends and fluff up until it’s just how you like it. This witch hat wreath would look super cute on an exterior porch wall or front door, on the mantle, or even sitting on a table with other Halloween decor.
More Halloween DIYs
https://www.sandandorsnow.com/2020/08/diy-farmhouse-halloween-garland/
- minnie mouse witch hat tutorial
- Minnie Mouse witch hat wreath
- witch hat mesh wreath diy
- Minnie Witch Hat Wreath DIY

Leave a Reply